New Sign for the Perimeter Rules

Examples for the Perimeter Rules

Referring to the photo of the ball inside the perimeter line, this is a drop, two club lengths, where it crossed into the perimeter with a one stroke penalty. The ball cannot be hit out of the perimeter.
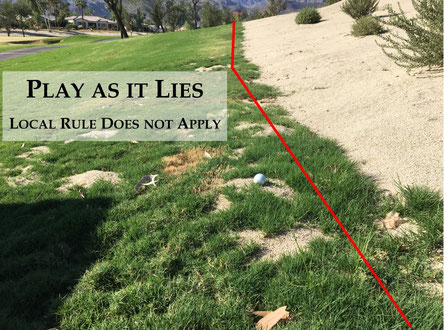
Referring to the ball resting on overspill in the rough but not inside the stakes/line then play as it lies.

Referring to the photo of overspill of the DG/Birdseye on the cart path and the ball rests on it, since it is on the cart path, it will be Free Relief/Drop.
PENALTY AREA/NO PLAY ZONE
The perimeter landscape area will be played as a
“Penalty Area/No Play Zone.”
This area will be marked with red lines and red stakes with black tops.
If your ball comes to rest in this penalty area, you MUST use one of the three (3) options listed below.
1) Stroke and distance. (re-hit from the original spot)
2) Straight back on the line. (Keeping the spot where the ball last crossed into the penalty area and on a straight
line to the pin, you may drop as far back as you choose).
3) Lateral relief. (Drop within two (2) club lengths of where the ball last crossed into the penalty area, no nearer the hole).
ALL THREE (3) OPTIONS CARRY A ONE (1) STROKE PENALTY
For a ball hit into the No-Play Zone to the right of Hole #17 a 4th option is available. Hit from the designated drop zone with a 1 stroke penalty.
If your ball comes to rest outside the penalty area/no play zone, but your stance or swing is affected by this area, you MUST find your nearest point of relief, plus one club length, no nearer the hole and take free relief (No Penalty).
You may retrieve your ball from the penalty area but at no time will you be allowed to play from or stand in the penalty area/no play zone to play your ball.